Victoria Law
3D Art Generalist
Dough Re Mi


Project: The Dough Re Mi Doughnut Shop is my first real environment level design with modular asset creation in mind. Initial project time took roughly 10 weeks. I'm currently reworking the project with my updated skill set.
Technology Notes: Unreal Engine 4.10.4, Maya 2015 & 2016, Adobe Photoshop CC, and Headus UVLayout Pro.
Design Notes: My workflow summary for this project is to (1) Get references to environment via online search engines (2) Model 3D assets in Maya (3) Cut UVs in Headus UV Layout (4) Texture Maps in Adobe Photoshop (5) Import all assets into Unreal Engine 4 (6) Incorporate PBR values and maps into UE4 material editor (6) Lighting and Post Process Effects.
Project Case Study
Topic: Creating a modular game environment from start to finish.
Tools: Unreal Engine 4, Maya, Headus UV Layout, Adobe Photoshop
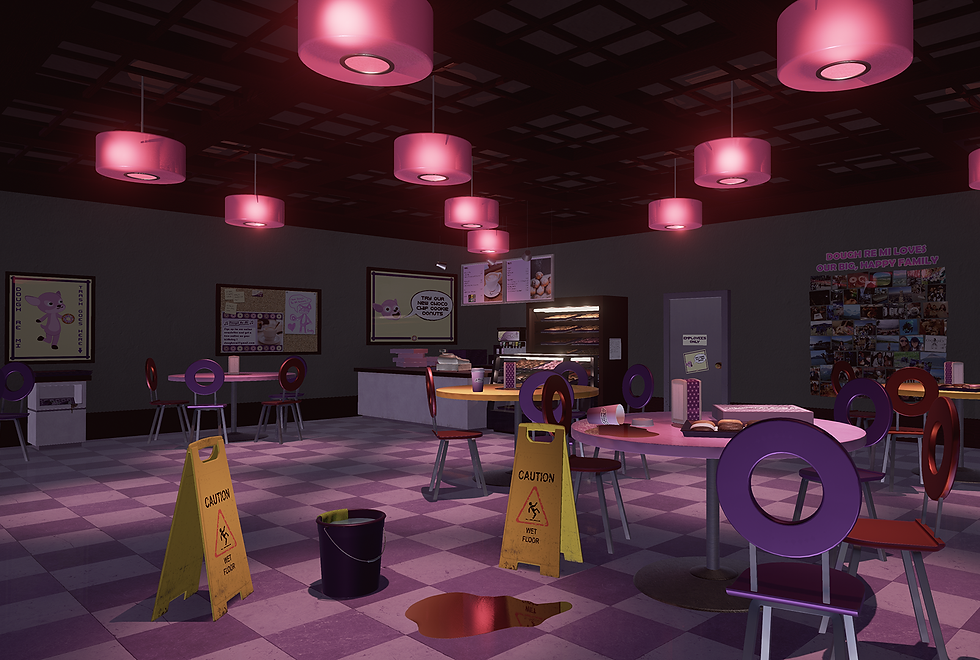
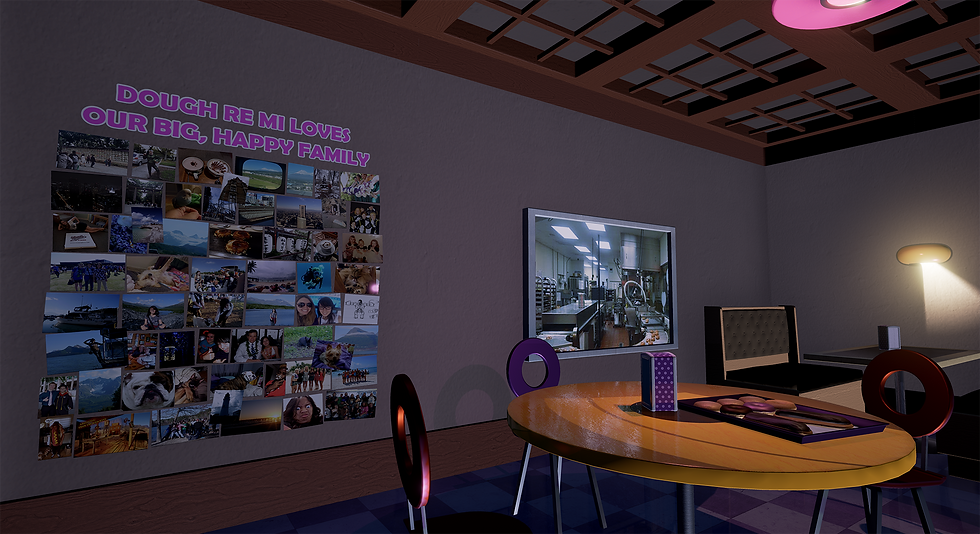
Concept: In this environment, I knew that I wanted to create a doughnut shop because I had specific modular assets in mind that I wanted to make (doughnuts, round chairs, advertisements, etc). Then, I came up with the narrative setting: would it be a cute mom n’ pop doughnut shop, a franchise chain store, or a dingy out-of-business dive cafe; would the narrative take place before opening, after closing, during an accident? Ultimately, I liked the idea of this cozy little shop full of memories for a small community during a time where there is a lull in activity, before closing late at night. Then I begin level designing.

Level Design/Blockout: Laying out the initial level design can help avoid mistakes in making assets, as you know what kind of models are needed and the dimensions they need to fit in order to fit together. Unreal has a unit grid system based on centimeters, so for example, if you used a 100x100x100 cm cube as a base of reference you can keep this value in mind when crafting other modular architectural elements so that the walls mesh well with the floors and ceiling, and nothing is left sticking out in weird places. With this in mind, I typically like to use grid paper for planning as it’s quick and easy to make revisions or new layout versions based on the modular work flow.
Level Block-Out: This can be done with more basic shapes and geometry brush actors, however, as I already have the models I need in mind, I’ll use those.

Awning
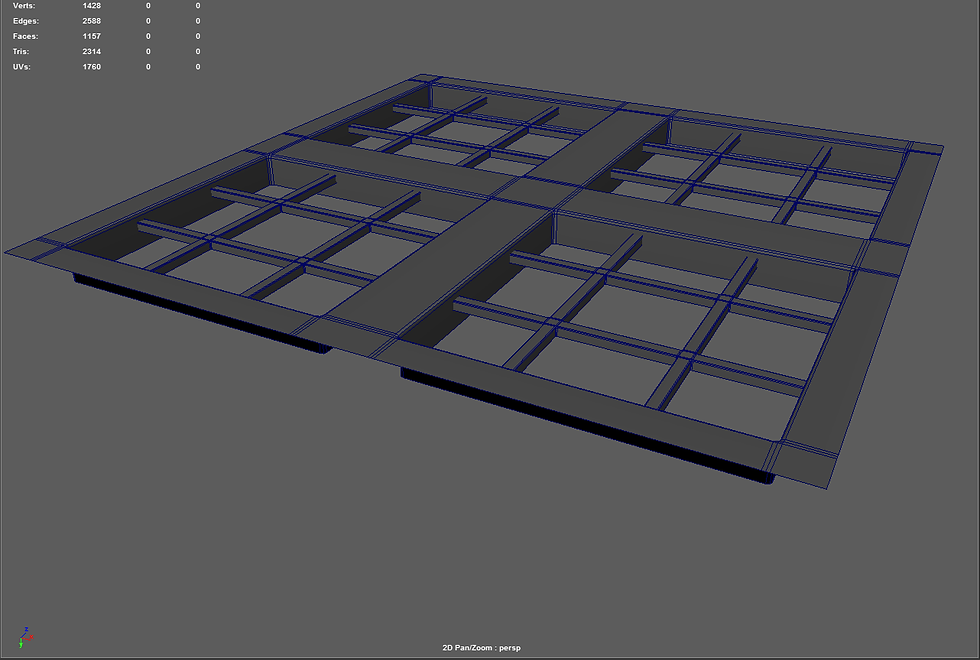
Ceiling Beams

Light

3/5 part modular wall kit (outside)

3/5 part modular wall kit (inside)

Streetlamp, Parking, Sidewalk

Wet Floor Sign from Photo Reference
Modeling: I wanted to keep this scene relatively small in order to concentrate on the quality. Assets can be divided into either modular assets or hero assets for interest and/or story telling. I like to list the assets I have in mind according to these categories, and when creating this list, I like to research reference photos or preferably, visit a real-life location that I find has many similarities to the one I am creating and take my own notes and reference photos (always ask permission in taking reference photos when doing this.)
Examples of Modular Assets: Chairs, tables, cups, lids, pastries, counters, shelves, walls, floors, ceiling components, light sources, take-out boxes, ad brochures, menus, parking lot structures, etc.
Examples of Hero Assets: Register, back room window, soda machine, cleaning bucket, etc.

UVs cut in Headus UVLayout

UVs cut in Headus UVLayout

UVs cut in Headus UVLayout

UVs cut in Headus UVLayout

UVs cut in Headus UVLayout

UVs cut in Headus UVLayout

UVs cut in Headus UVLayout

UVs cut in Headus UVLayout

UVs cut in Headus UVLayout
UVs: I like to cut more complicated UVs with Headus UV Layout, as I can quickly control which UVs I want cut and grouped together on a model. To do this, I export the model as an OBJ file and import into Headus. After UVs are cut, I usually copy the UVs into a new UV set to make a light map, and I make sure there is spacing in between the UVs. This is more reliable than auto generating light maps when importing in unreal, as sometimes the auto light mapping feature lays UVs on top of each other, which results in lighting problems in the game environment

UV Snapshot opened in Photoshop

Color Map made from photo reference, illustrator vectors, and grunge maps

height map made from mostly flat, color data and illustrator shape with layer styles, then desaturated

bring heightmap into xNormal to make normal from height map and ambient occlusion from height map

Normal Map

Ambient Occlusion Map

Roughness map made from color data, vector images, layer masks, and grunge maps
Texture Mapping: (Color/Albedo, Normal, Specular, Metalness, Roughness, Bump, Displacement, Emissive, Mask, etc.)
Typically I make my textures using seamless textures in Photoshop and/or vectors from Illustrator , however I've been learning Substance Painter and Designer lately and both hold a lot of promise for improving my work flow. But for now, I'll outline my photoshop work flow
Tilable Textures: If I know I'm going to be using a type of texture a lot, either for the same material multiple times or for material instancing, I'll use a seamless, tilable texture, make a height map by desaturating it and possibly using other filters on it to get the right height values, go into xNormal and make normal and ambient occlusion maps from the height map, and thereby generate a good portion of my maps from one original reference.
Textures for Specific Assets: Other times, assets can't be properly made without specific tailoring to the needs of the mesh. This is accomplished in photoshop with many layer types, filters, grunge maps, and selecting parts of UVs so that maps can be made properly for PBR workflow. Because everything from the tilable textures workflow can be accomplished in a relatively similar manner to this workflow, I'll show the process from this point of view.

Export Selection from Maya with pivot at center of grid

Export options: export as an FBX

Import file into Unreal

Import file into Unreal

Import with your preferred settings

Create Materials from Textures and Apply these to All Material IDs on your Mesh
Export/ImportModels: It’s important to export models with their UVs cut and light maps created while their pivot points are located at the center of the Maya grid. FBX files are typically used for unreal, and when exporting a mesh as an FBX, the geometry will be converted from quads to tris, if applicable.

Take your image files

Open up the maps with the most detail (usually color and sometimes normal)

Change to no mipmaps to avoid low level of detail in your scene, although this will be costly with lots of textures

Save, then make a material from your color map and drag in the other related maps
Textures/Materials: Take the texture's you've been working on and use the same import function in unreal that you used for the meshes.

Static Mesh with 3 Material IDs

Lamp Body Material: Subsurface Scattering

Emissive Light Material: change to unlit to save performance, especially because default lighting has no purpose on fully emissive materials

The material will become invisible, but don't worry, it will become visible once you boost the emissive strength in its material instance

Material instance of parent emissive material
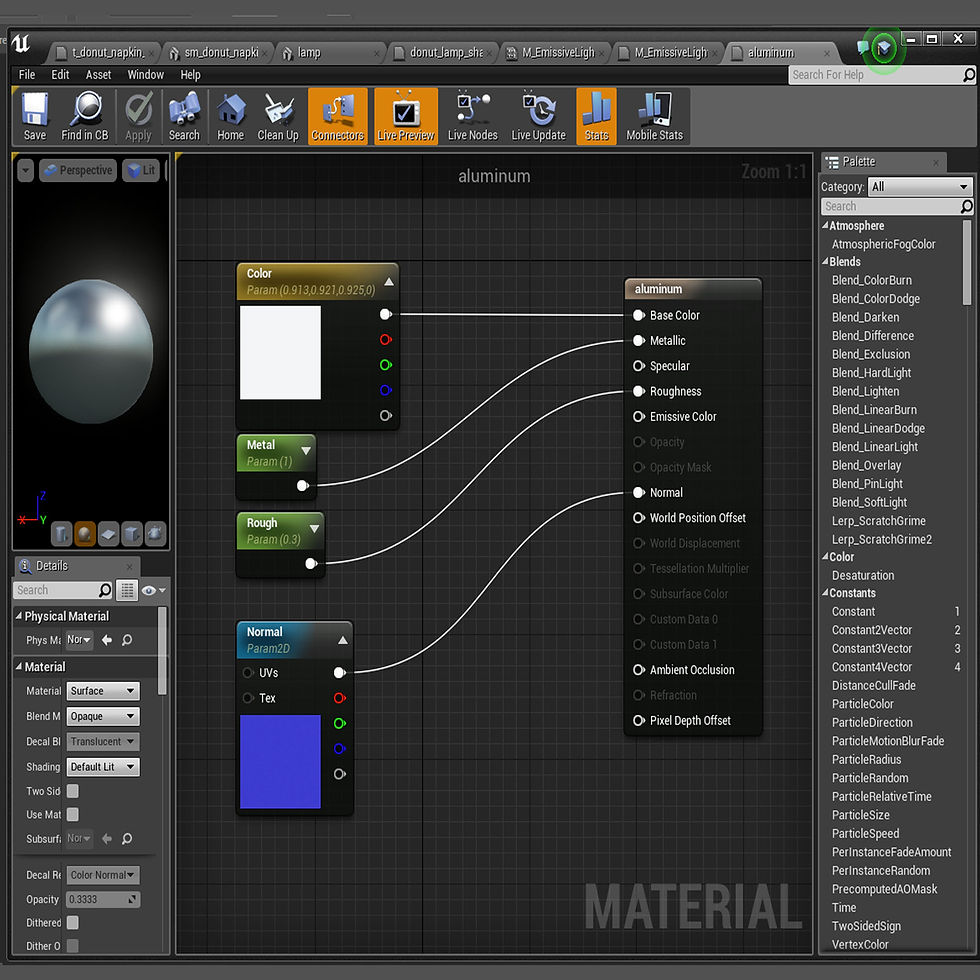
Metal material
PBR: There are many references for PBR values that can be found online, especially for Unreal Engine 4, although the practice is very theoretical and values can be exaggerated for desired effects. But essentially, PBR helps calculate how lighting appears on the surface of a material. The basic PBR settings are Metalness, Roughness, and Specularity. Their values range between 1 and 0: 1 being completely “on” and 0 being completely “off,” so if you have a typical metal object, its value would be 1, or completely “on.” This concept is helpful when you have an object that has varying ranges of values throughout its surface, in which case, you need to make a specific map rather than just plugging a single value into the corresponding PBR nodes. Going back to the 1/0 on/off concepts from
earlier, 1 is also represented by pure white, whereas 0 is represented by pure black. Think of it as a light switch: turning a light switch on floods a room with white light, whereas turning the switch off leaves the room black. Therefore, when you have in-between decimal values, this information can be represented by varying values of gray, which isn’t completely black or white.
Lighting: Lighting is important for both making the scene properly readable as well as conveying mood that goes with the narrative. Having light coming from logical light sources and adding and enhancing the color values of the scene creates a more interesting composition. It’s good to have knowledge of color theory for this part of development especially, and film does a really good job of providing many diverse examples of excellent color theory and lighting.